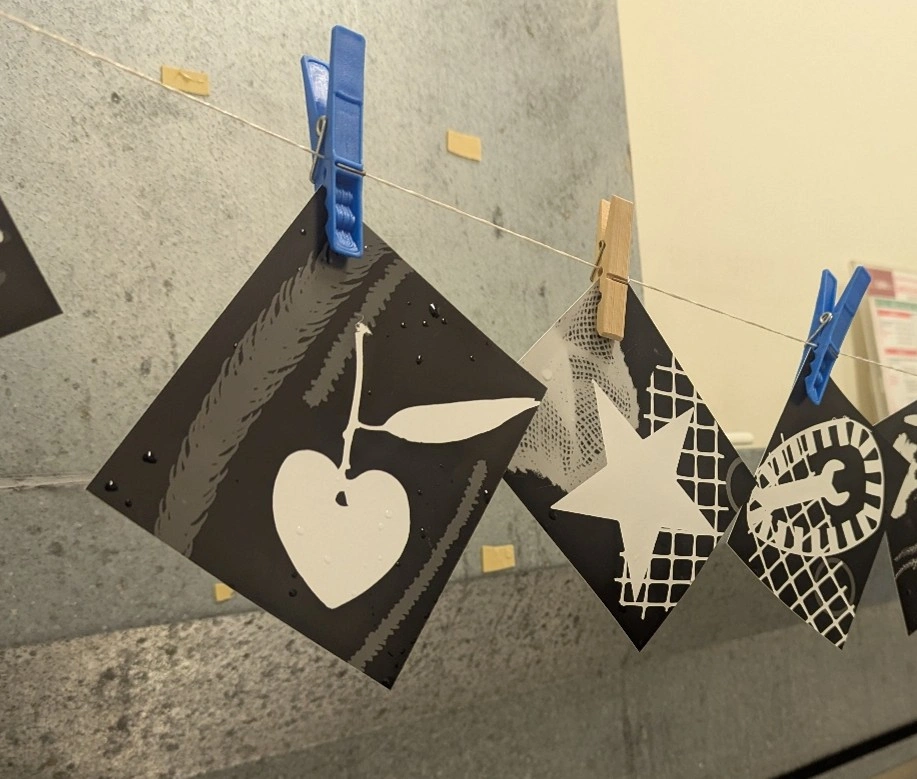
A Photogram is an image made without a camera. From placing objects directly on to the surface of light sensitive materials (i.e. Ilford paper), exposing the arrangement of components to light and following the materials developing process, an image is created.
Uniqueness of these images depend on an array of variables. There is found creativity in the objects I choose, the distance they are placed from the light source and the length of time I expose them to the light.
Using an enlarger as the light source, and Ilford paper as my light sensitive material (both pictured below), I have been experimenting with this process at the ACA’s darkroom facilities.

Enlarger light source (left), Illford light-sensitive paper (right)
I’ve given-it-a-go creating Photograms before, over 25 years ago! A quick Google search for famous Photogram artists revealed some surprising results. Contemporary British photographer, Adam Fuss gained my initial attention.
Throughout this studio exploration, I found the photography studio to be strongly process driven. Although there can be a great element of spontaneous creativity, there involves planning and processes to support an artworks success. I find comfort in this technique.
I followed these steps:
1. Collecting and idea generating: the process of sourcing components to construct the image, sketching and planning compositions to create with once in the dark room.
2. Prepare the Darkroom including setting up the enlarger & chemical baths.
3. Dark Room Time ! – Create, Expose the Paper, Develop the image.
Collecting & Idea Generating:
Spanning over a few afternoons, I collected items around my property that inspired interest for how they may translate the light onto paper, bringing them to the photography studio in a plastic takeaway container.
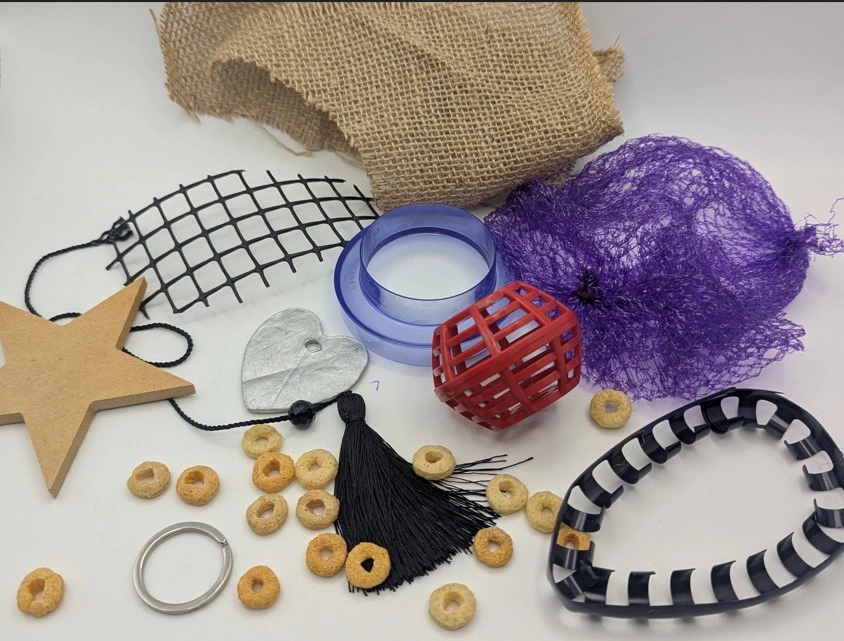
Collection of items used to explore creating Photograms.
Prepare the Darkroom:
The darkroom uses a low-level red light which is safe for light sensitive materials such as Ilford branded paper. Any outside light sources will damage this paper, even from your mobile phone! But before turning the lights off, I set up my workspace.
Safety first! It’s going to be dark, there are chemicals to be aware of and also slips from water on the floor. Wash your hands and keep your safety and the safety of others around you, in the forefront of your mind at all times.
Using the enlarger as the overhead light source, the first step is to create a sharp edged window of light. To achieve this, I raise and lower the enlarger head until the area of light projected covers enough for my paper size .
To set the aperture, I turned the lens all the way, and back one click (one F-stop).

The chemical setup (pictured) involves 5 steps. Each of these steps require preparation in trays with associated clean tongs by each side. Additionally clean empty trays to transport developed images to of the darkroom into natural light to review, decreasing a slipping hazard.
Using your darkroom tongs to handle the paper, move it through the following liquid baths:
Developer – Ilford Multigrade (1 minute): Submerge the paper and gently rock the tray. Watch as your image magically appears!
Stop Bath – Ilford Ilfostop (10 seconds): Stops the developing process immediately.
Fixer – Ilford Hypam (30 seconds): Makes the image permanent and light-safe.
Water Wash (5 minutes): Rinses off all the leftover chemicals.
Hang your finished photogram to dry
Turn the lights off - Dark room time!
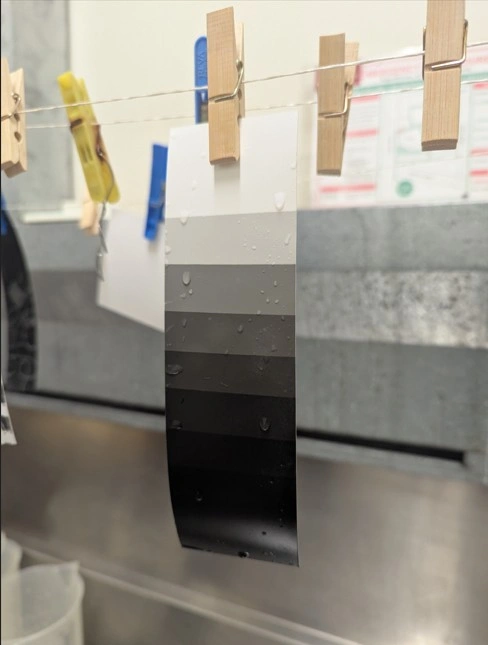
Successful test strip in increments of 2 secs, totalling 16 seconds.
Firstly, a test strip! This was my most challenging part of the process and learnt much about the sensitivity of the paper. It took me 4 attempts to get a test strip (smaller piece of light-sensitive pper) that I could rely on.
Place the paper, shiny (emulsion light sensitive) side up, on the enlarger base plate. Using a thick light blocking board, I exposed the test strip in evenly spaced intervals of 2-3 seconds, up to 10 times. Following the developing process, I outlined earlier, the test strips were created. Until finally I produced a successful test strip with a suitable number of varying tones, including a crisp dark tone. This being my timer setting required to now create my photograms.
An interesting second-hand learning; after developing a test strip, a fellow student shared their experience with me, of how they accidentally exposed their test strip with the glossy side down. An interesting error which I also learnt from. The light still affected the paper, but gave a ghostly tone to it. Something I will remember to maybe utilise in the future for a potential creativity opportunity.
It’s important to always start the studio practice with a test strip as variables between each enlarger station and timer will occur. I am talking, Seconds! Small fractions of time make a difference. I quickly learnt from my test strips that there are precise parts to creating in the dark room.
Now all set up ready to go, I arranged my items using the concepts and ideas I had planned for earlier, as well as adding anything creative on-the-go. Arranging the components of a composition in a low-light environment is an intriguing process. Essentially, I’m creating an image, by exposing light to the paper using a variable shot amount of time (I’m talking only 16 seconds), placement and shadow, moving items on and off, but nothing appears. There is no indication if I’ve created anything at all, until I now head to the developing station with my paper.
This concept, very much reminds me of the days I owned camera with film and wasn’t sure if I had captured a subject until sometimes weeks after when the film was developed!
I find it a poetic process to watching my image come to life in the developing stage. I’m eager to see what appears first, what have I created….. I wont know for a few minutes!
As an individual that has a history of being process driven, this technique allows me to feel a familiar sense of achievement. There is a start and an end. Unless I’m hand colouring or using my photo in an installation etc, the art is finished. Unlike painting or drawing, where you can always add more and there is a decision to make when to stop. For me this has been often an internal battle.
The magic of cameraless photography.
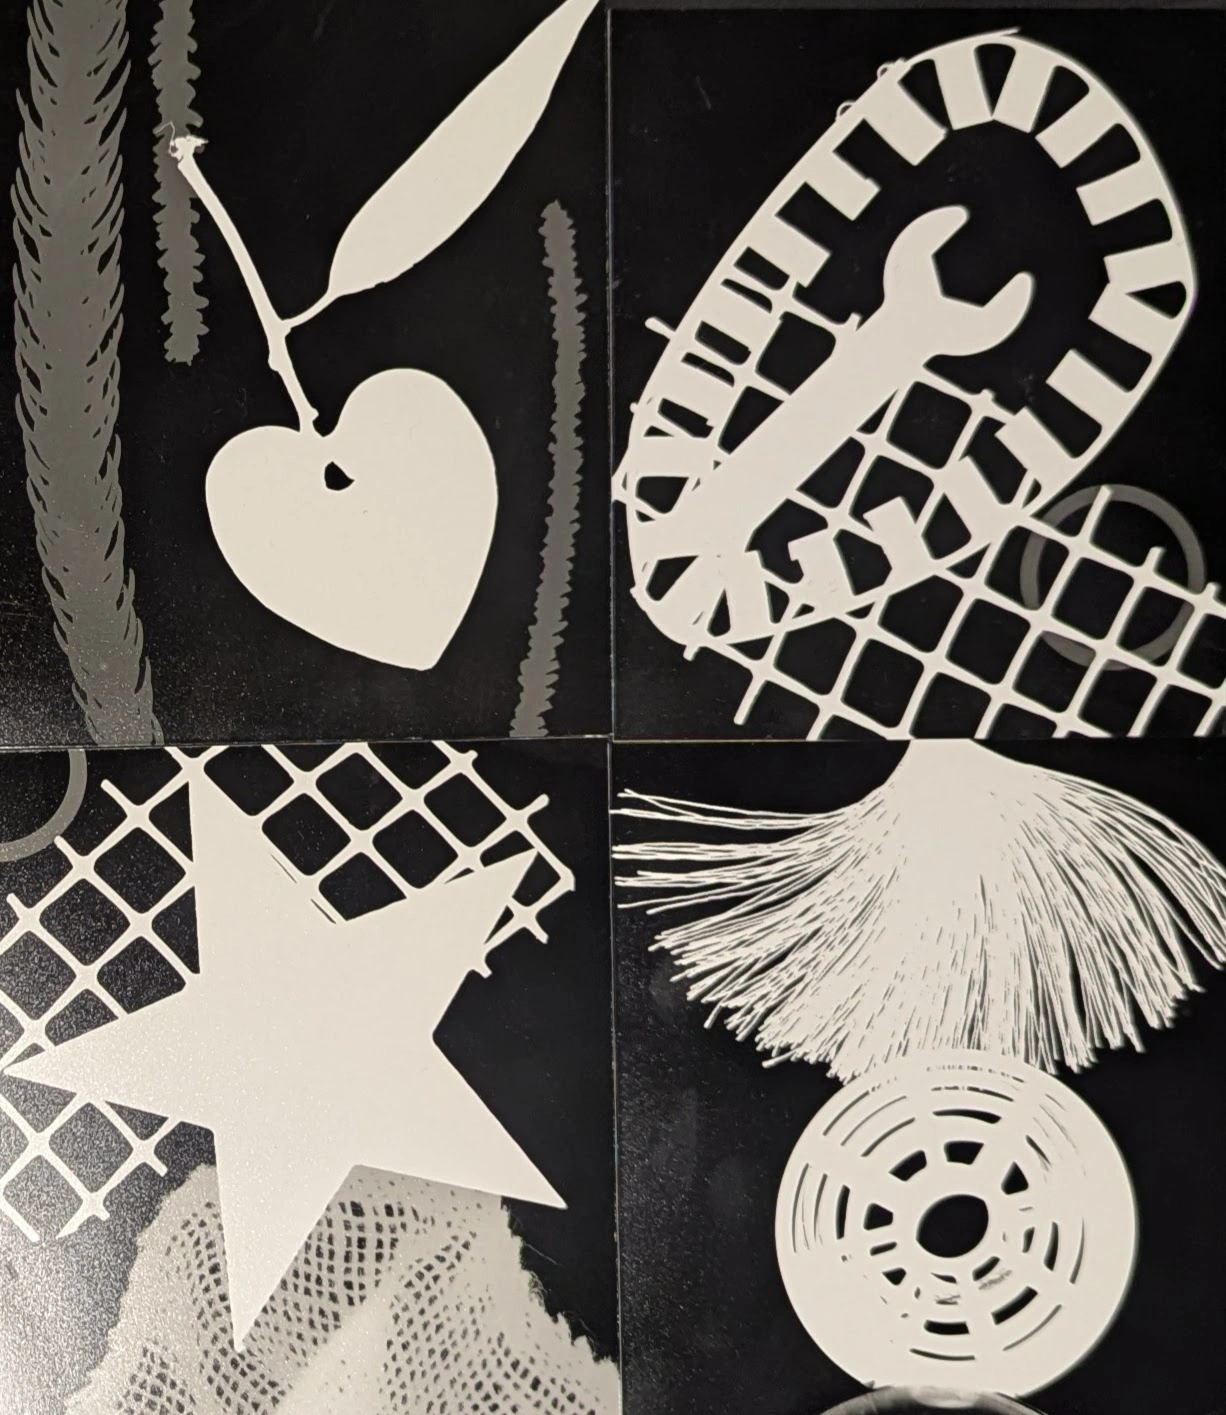
Untitled, composition of Photograms, 2026.
A second exploration in the dark room, using a negative taken and developed kindly by my lecturer, I combined my portrait and toothpicks.
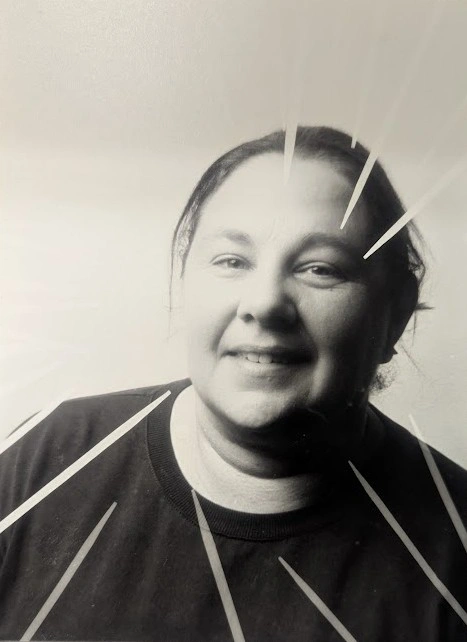
Toothpicky, 2026.